A custom domain gives your customer portal a familiar address. Connecting it involves ownership, DNS routing, HTTPS and application readiness. CENTRANET shows these steps separately so you can keep using the default workspace link while the new address is being prepared.
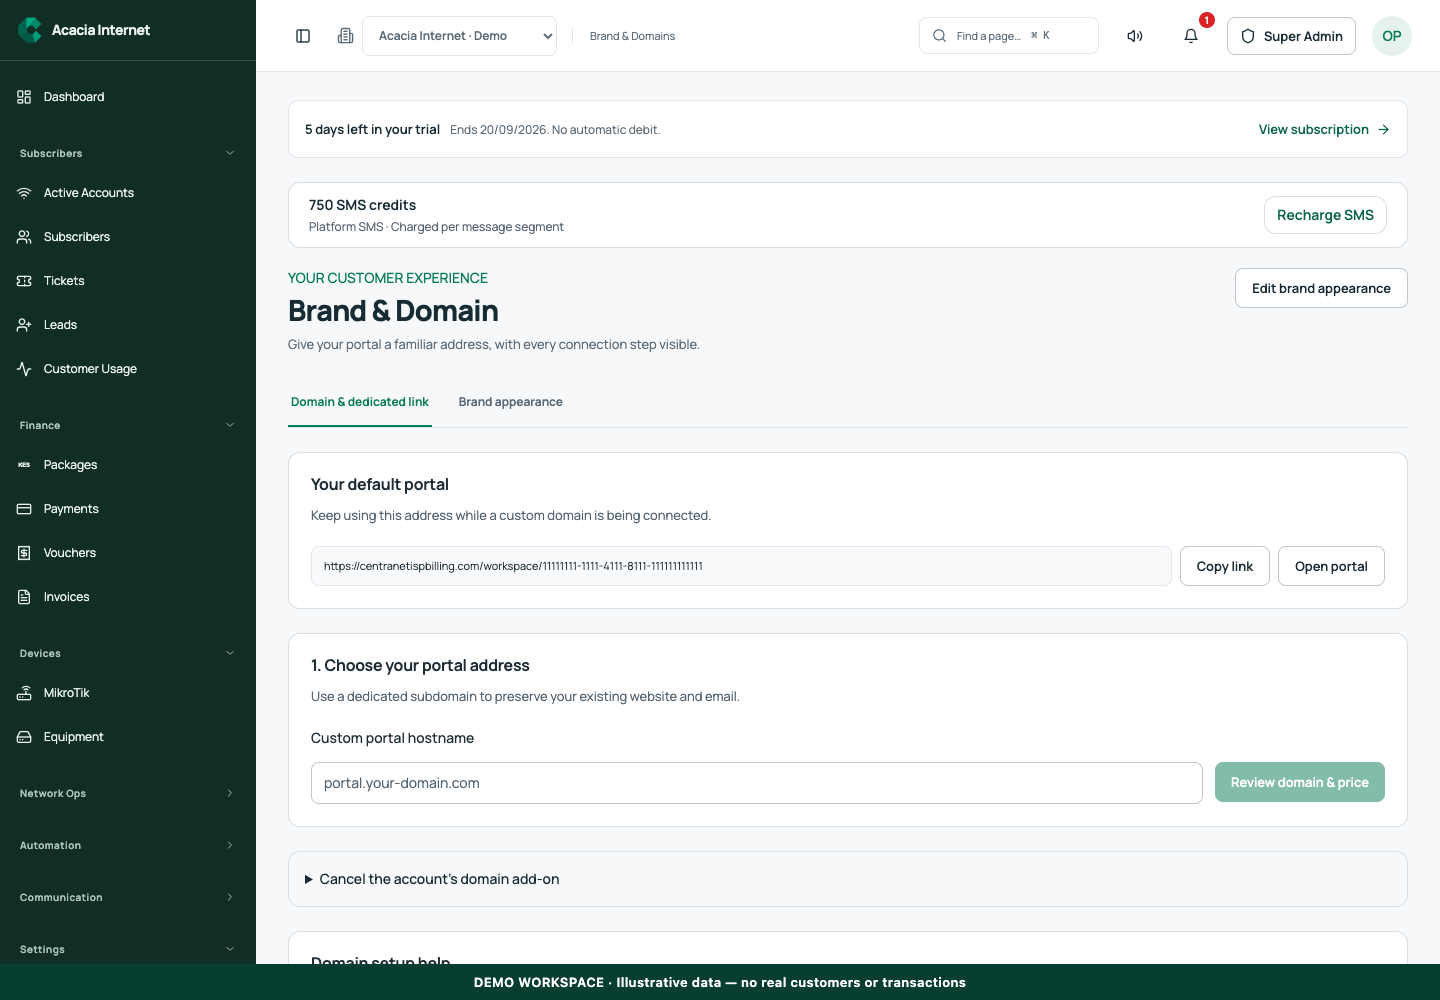
Before you start
Open /brand-domain in the workspace you intend to manage. The workspace name determines which routers, subscribers and records you can see. These screenshots use Acacia Internet, a fictional training workspace. Names, phone numbers, addresses, account counts and money shown are demonstration data; do not copy them into a live customer record. Your available controls depend on your role, plan and configured integrations.
1. Keep the default portal link available
Open Brand & Domain and copy the dedicated workspace link under Your default portal. Test that address before starting a custom domain connection. Keep it available to support staff during setup. A custom-domain request should not require changing unrelated website or email records, and the default link gives you a known route while DNS updates are still propagating.
2. Choose a dedicated subdomain
Enter a hostname such as portal.example.com in Custom portal hostname. This is an example, not a domain supplied with your account. A dedicated subdomain helps preserve the existing website and mail services at the root domain. Review the normalized hostname displayed by the form, then choose Review domain & price.
3. Review the actual seller and terms
Read the quoted price, billing period, seller and billing-start information. If an existing entitlement covers the domain, the interface should explain that. Accept the terms only after checking the exact hostname and quote. Do not rely on a fee copied from another workspace or an old screenshot; reseller terms and entitlements can differ.
4. Add only the requested DNS records
Follow the records displayed in Connect DNS. Use supported automatic assistance when available, or enter the records manually at your DNS provider. Preserve existing website and email records unless the setup explicitly requires a specific change. If another person manages DNS, use the expiring setup link and revoke it when the task is complete.
5. Track DNS and certificate checks
Choose Check connection and review each result in the connection section. DNS updates and certificate issuance may take time. A CNAME existing at the provider is not the same as the application having completed every readiness check. Keep the operation reference and use the saved state; repeatedly creating new domain requests will not make DNS propagate faster.
6. Test the live domain as a customer
When the view reports the portal domain is live, open Open verified portal. Verify HTTPS, branding and the expected workspace. Then test login, password reset and invitations separately. For Hotspot use, also test reachability before authentication on the actual customer network. Domain readiness alone does not prove captive clients can reach all required login and payment destinations.
Confirm the result
The final check should include the correct host, a valid secure connection, the intended workspace brand and a working customer authentication journey. Keep a record of the DNS entries and who controls the domain account. Review renewal and billing responsibilities so the domain is not lost because a staff member’s personal account expired.
Questions and troubleshooting
Why is a domain still pending? Inspect the specific DNS, certificate or origin check rather than guessing. Can I point the whole root domain at the portal? Use the supported hostname rules and consider the existing website and email first. Does a green connection check verify customer internet? No; test the captive and subscriber service paths separately. What if automatic DNS assistance is unavailable? Use the provided manual records and verify them through the same connection checks.
Continue with the next task
Next read brand appearance and customer portal access.
This guide describes the application reviewed on 15 September 2026. If a screen displays a warning, follow that specific message before continuing. For support, include the workspace, affected record, time of the attempt and the operation reference where available. Never include passwords, router command tokens, payment secrets or verification codes in a public support message.