Your workspace is the boundary around your internet business. It holds your routers, customers, packages, branding and operating permissions. Start here before copying a MikroTik setup command or adding subscribers. A well-organised first day makes later payment reconciliation and customer support much easier.
Before you start
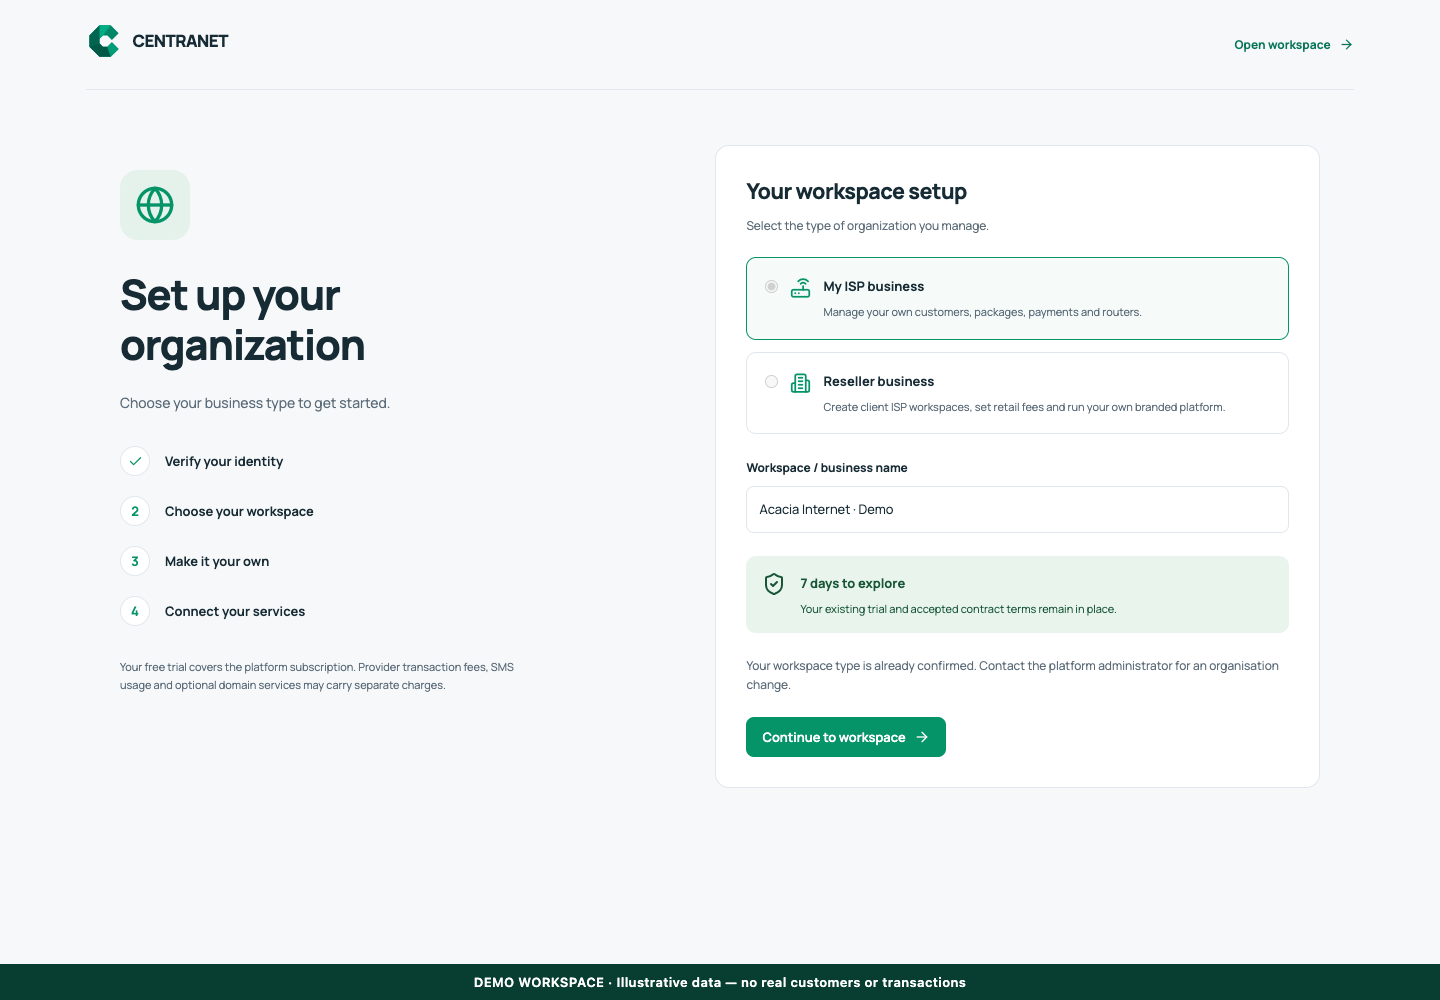
Open /onboarding in the workspace you intend to manage. The workspace name determines which routers, subscribers and records you can see. These screenshots use Acacia Internet, a fictional training workspace. Names, phone numbers, addresses, account counts and money shown are demonstration data; do not copy them into a live customer record. Your available controls depend on your role, plan and configured integrations.
1. Create and verify your owner account
Use the sign-up option on the sign-in page and enter an email address you control. Complete the verification requested by the application. Keep the owner account for administration and invite staff under their own identities later. An email address typed into a form is not proof that the mailbox works: complete the verification link and test signing in before you start network installation.
2. Choose the correct business workspace
If the account belongs to more than one organization, select the intended workspace before opening setup. Review the business name and whether you are operating an ISP or a reseller business. A reseller manages client organizations, whereas an ISP workspace manages its own subscribers and routers. Do not create a second workspace simply because the first one is waiting for verification; return to the existing selection and check its access.
3. Review the current trial and subscription terms
Read the trial duration and plan allowances actually shown on the setup screen. Trial policy can change, so use the displayed dates rather than a price copied from an old screenshot. Review the acceptance checkbox, then choose Confirm workspace & continue. Record the trial end date for your team. An active trial does not by itself verify a payment gateway or install a router.
4. Set up the business identity and contacts
Open Settings and follow Brand & identity. Enter the business name customers recognise and the support contacts that staff actually monitor. Prepare a clear logo and square app icon for the upload controls. Next review customer notification contacts and the email sender. Good branding includes working support links and an identifiable sender, not only a colour change.
5. Connect one router before creating the full catalogue
Use one test router and one small test package for the initial installation. Confirm its internet connection, complete the clean setup checklist and wait for router verification. Assign the test package to that router, then create a test subscriber. Keeping this first path small makes it easier to identify whether a problem belongs to the router, the package, the subscriber or the payment provider.
6. Complete one customer journey
Open your portal as a customer would. Confirm that the right brand and packages appear, sign in using the supported customer process, and verify the account view. If testing a live payment, use your own authorized account and retain its real reference. Review the corresponding payment and service status in the workspace. Remove or disable unused demonstration records once the test has served its purpose.
Confirm the result
You should be able to sign in, select the correct workspace, see its current trial or plan, open its settings and identify the next incomplete setup step. Before marketing the service, verify one router and one customer journey end to end. Keep a short internal checklist of who owns billing, technical support and customer communication.
Questions and troubleshooting
Why am I asked to choose a workspace again? Your account may have multiple memberships, or no saved selection in this browser tab. Select the intended organization and check access. Why is a feature unavailable during setup? Review the displayed plan, permission or integration requirement. Creating another account does not resolve a missing entitlement. Should staff share the owner login? No. Separate staff identities make access changes and activity records meaningful.
Continue with the next task
Next read MikroTik onboarding and brand identity setup.
This guide describes the application reviewed on 15 September 2026. If a screen displays a warning, follow that specific message before continuing. For support, include the workspace, affected record, time of the attempt and the operation reference where available. Never include passwords, router command tokens, payment secrets or verification codes in a public support message.